Mirror Glazed Cakes
I admitted missed the whole craze of mirror-glazes - the shiny cake coatings that can produce some truly amazing-looking cakes. Despite the warnings that these glazes often don’t taste as good as they look, I was determined to understand the process. Though they are traditionally made with mousse cakes or “entrements” (essentially a mousee encasing one more more additional components), they can be applied to any cake with a smooth surface. That smooth service is the key, meaning they have to be first frosted with either buttercream or ganache and smoothed meticulously to avoid blemishes from showing. The glazes themselves can be based on either regular chocolate (in which case they have a shiny, though monochromatic, finish) or a white chocolate base, which allows for color variations. Luster dust can be added for shine or other effects.
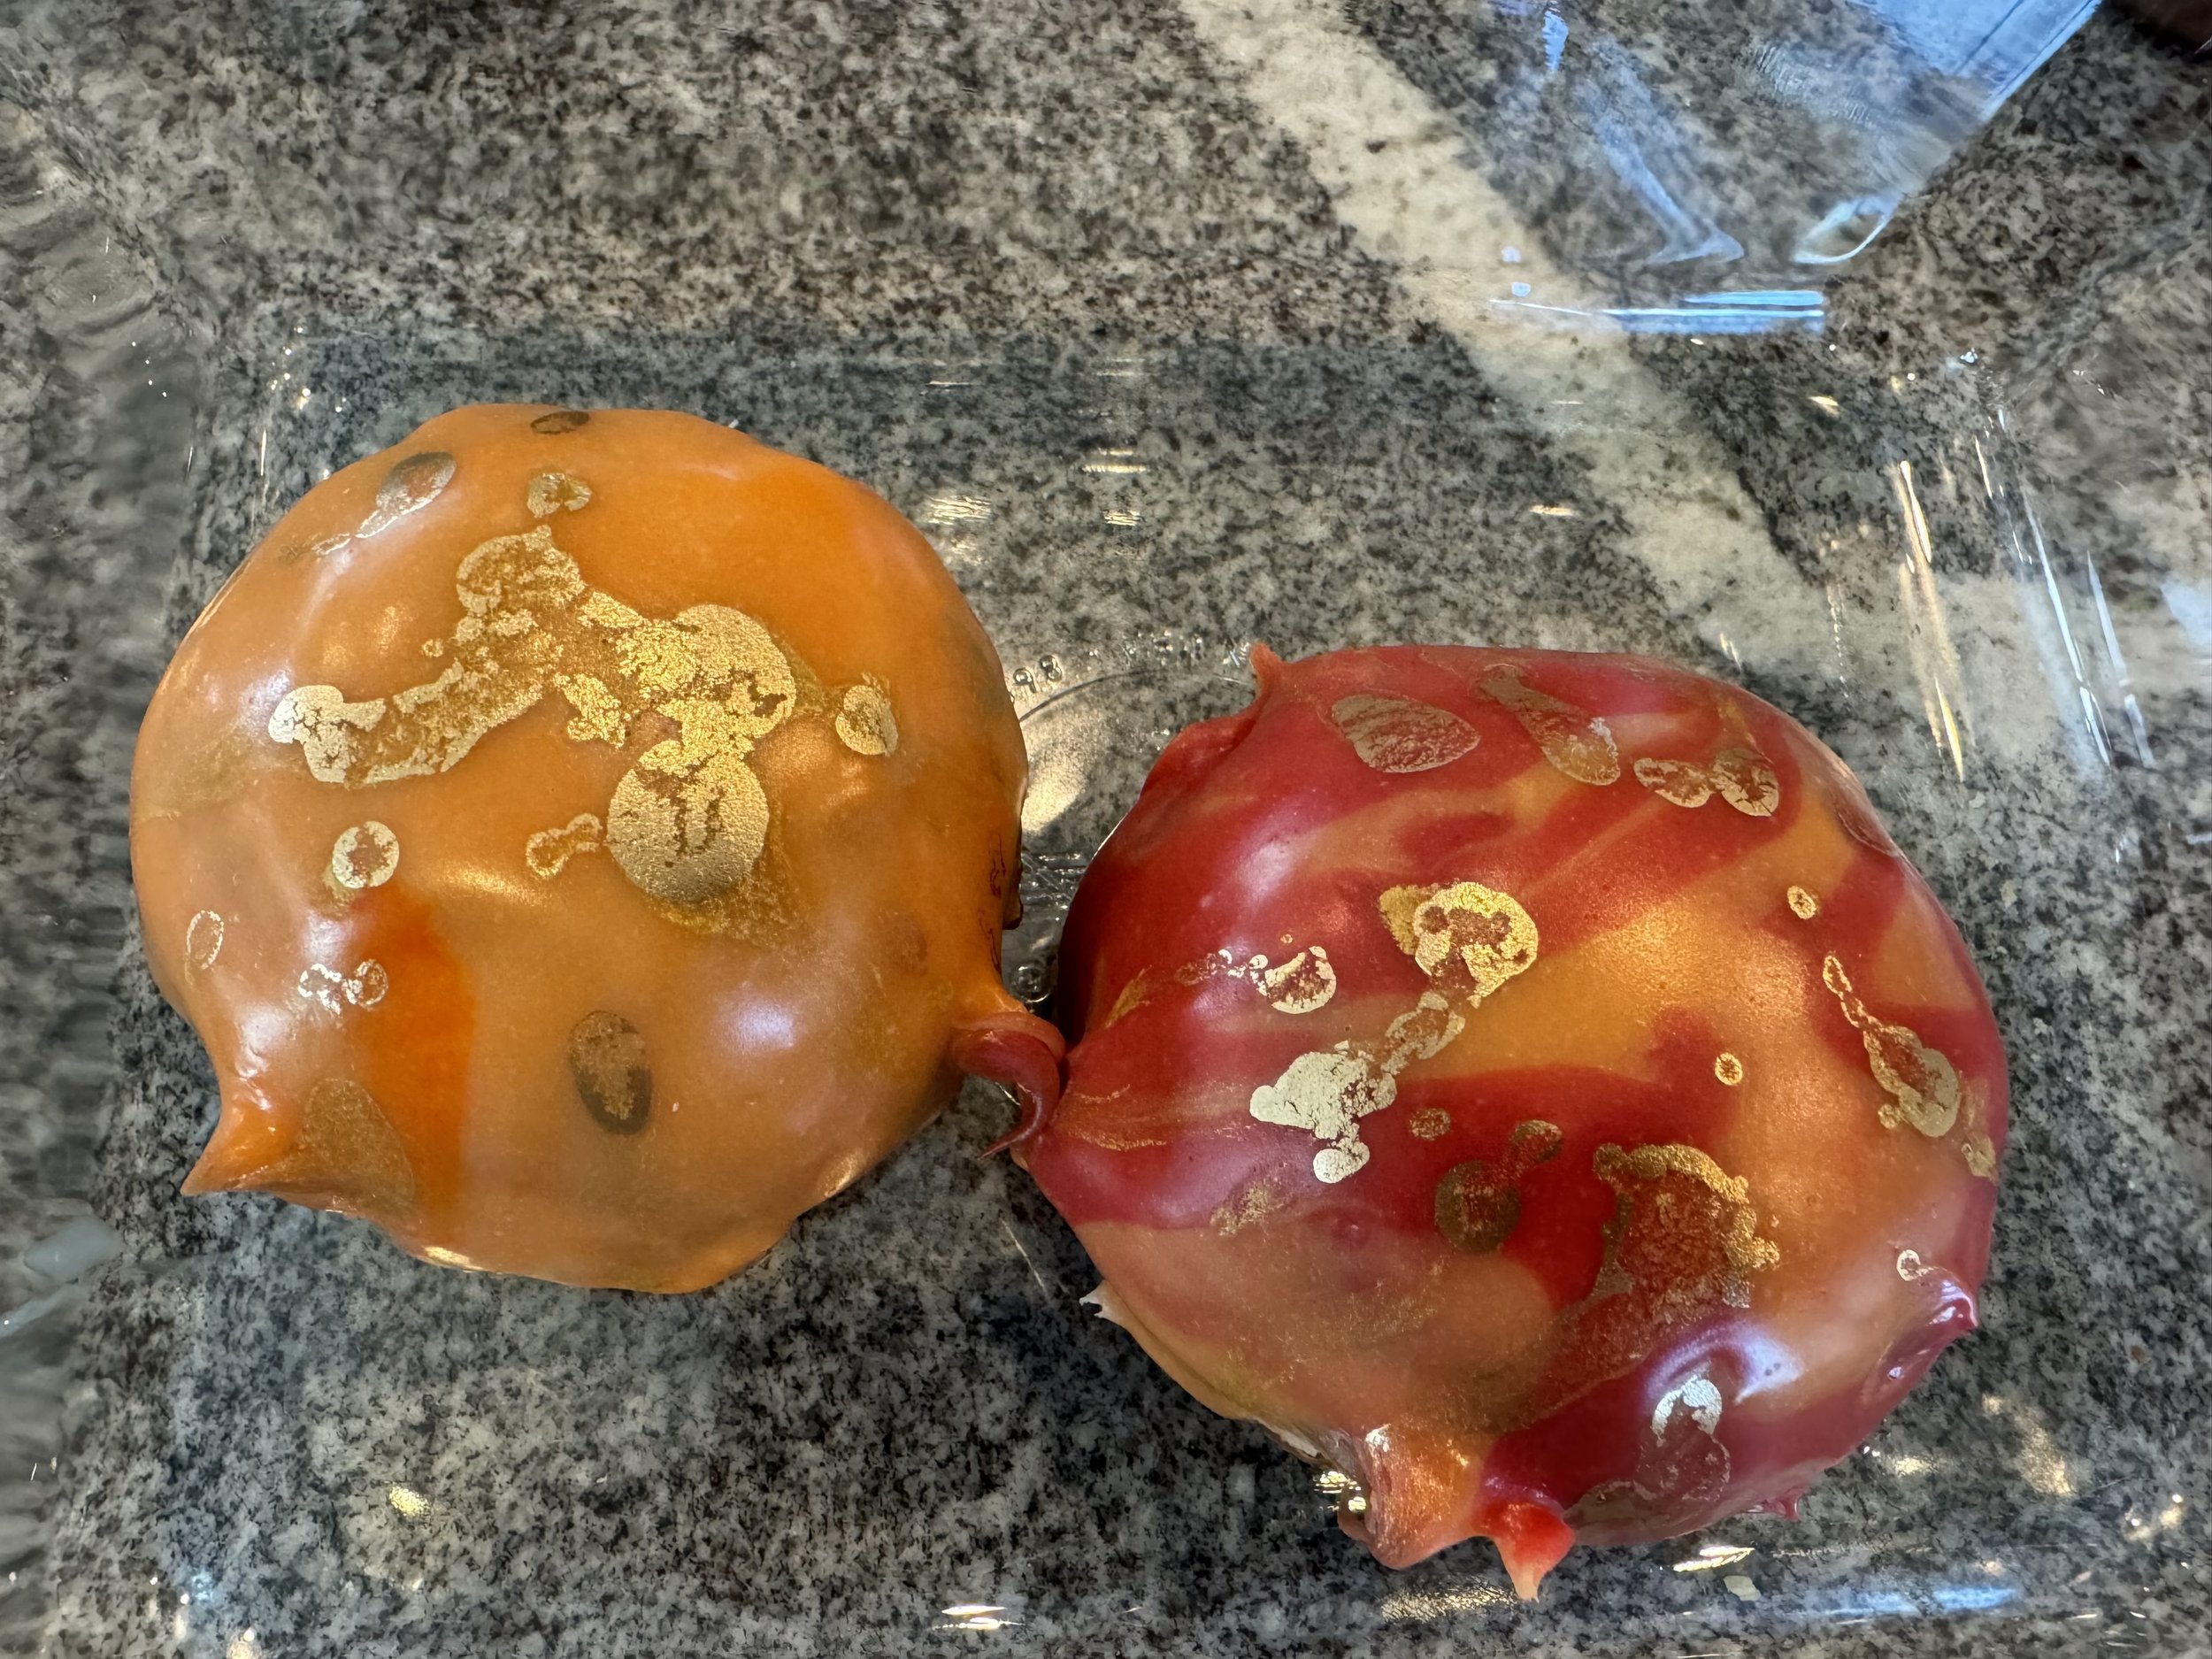
As usual, analysis paralysis hit. There are numerous recipes online, many of which differ drastically. My first attempt was to go simple. A two-ingredient mirror glaze promised the desired effect using a 2:1 combination of heated white chocolate and cream. Though the website suggested using a microwave, I stuck with the more traditional approach of heating the cream and pouring it over the chocolate. Isn’t this just a white chocolate ganache? Yes, it is. While the website pictures looked glossy, my own results were not quite the reflective multilayered finish I had been hoping for. I spiced things up by mixing some gold luster dust in vodka and flicking some of the mixture onto the cake with a paint brush. It didn’t look bad, but it was on the thick side and, again, wasn’t quite as mirror-like as I had hoped.
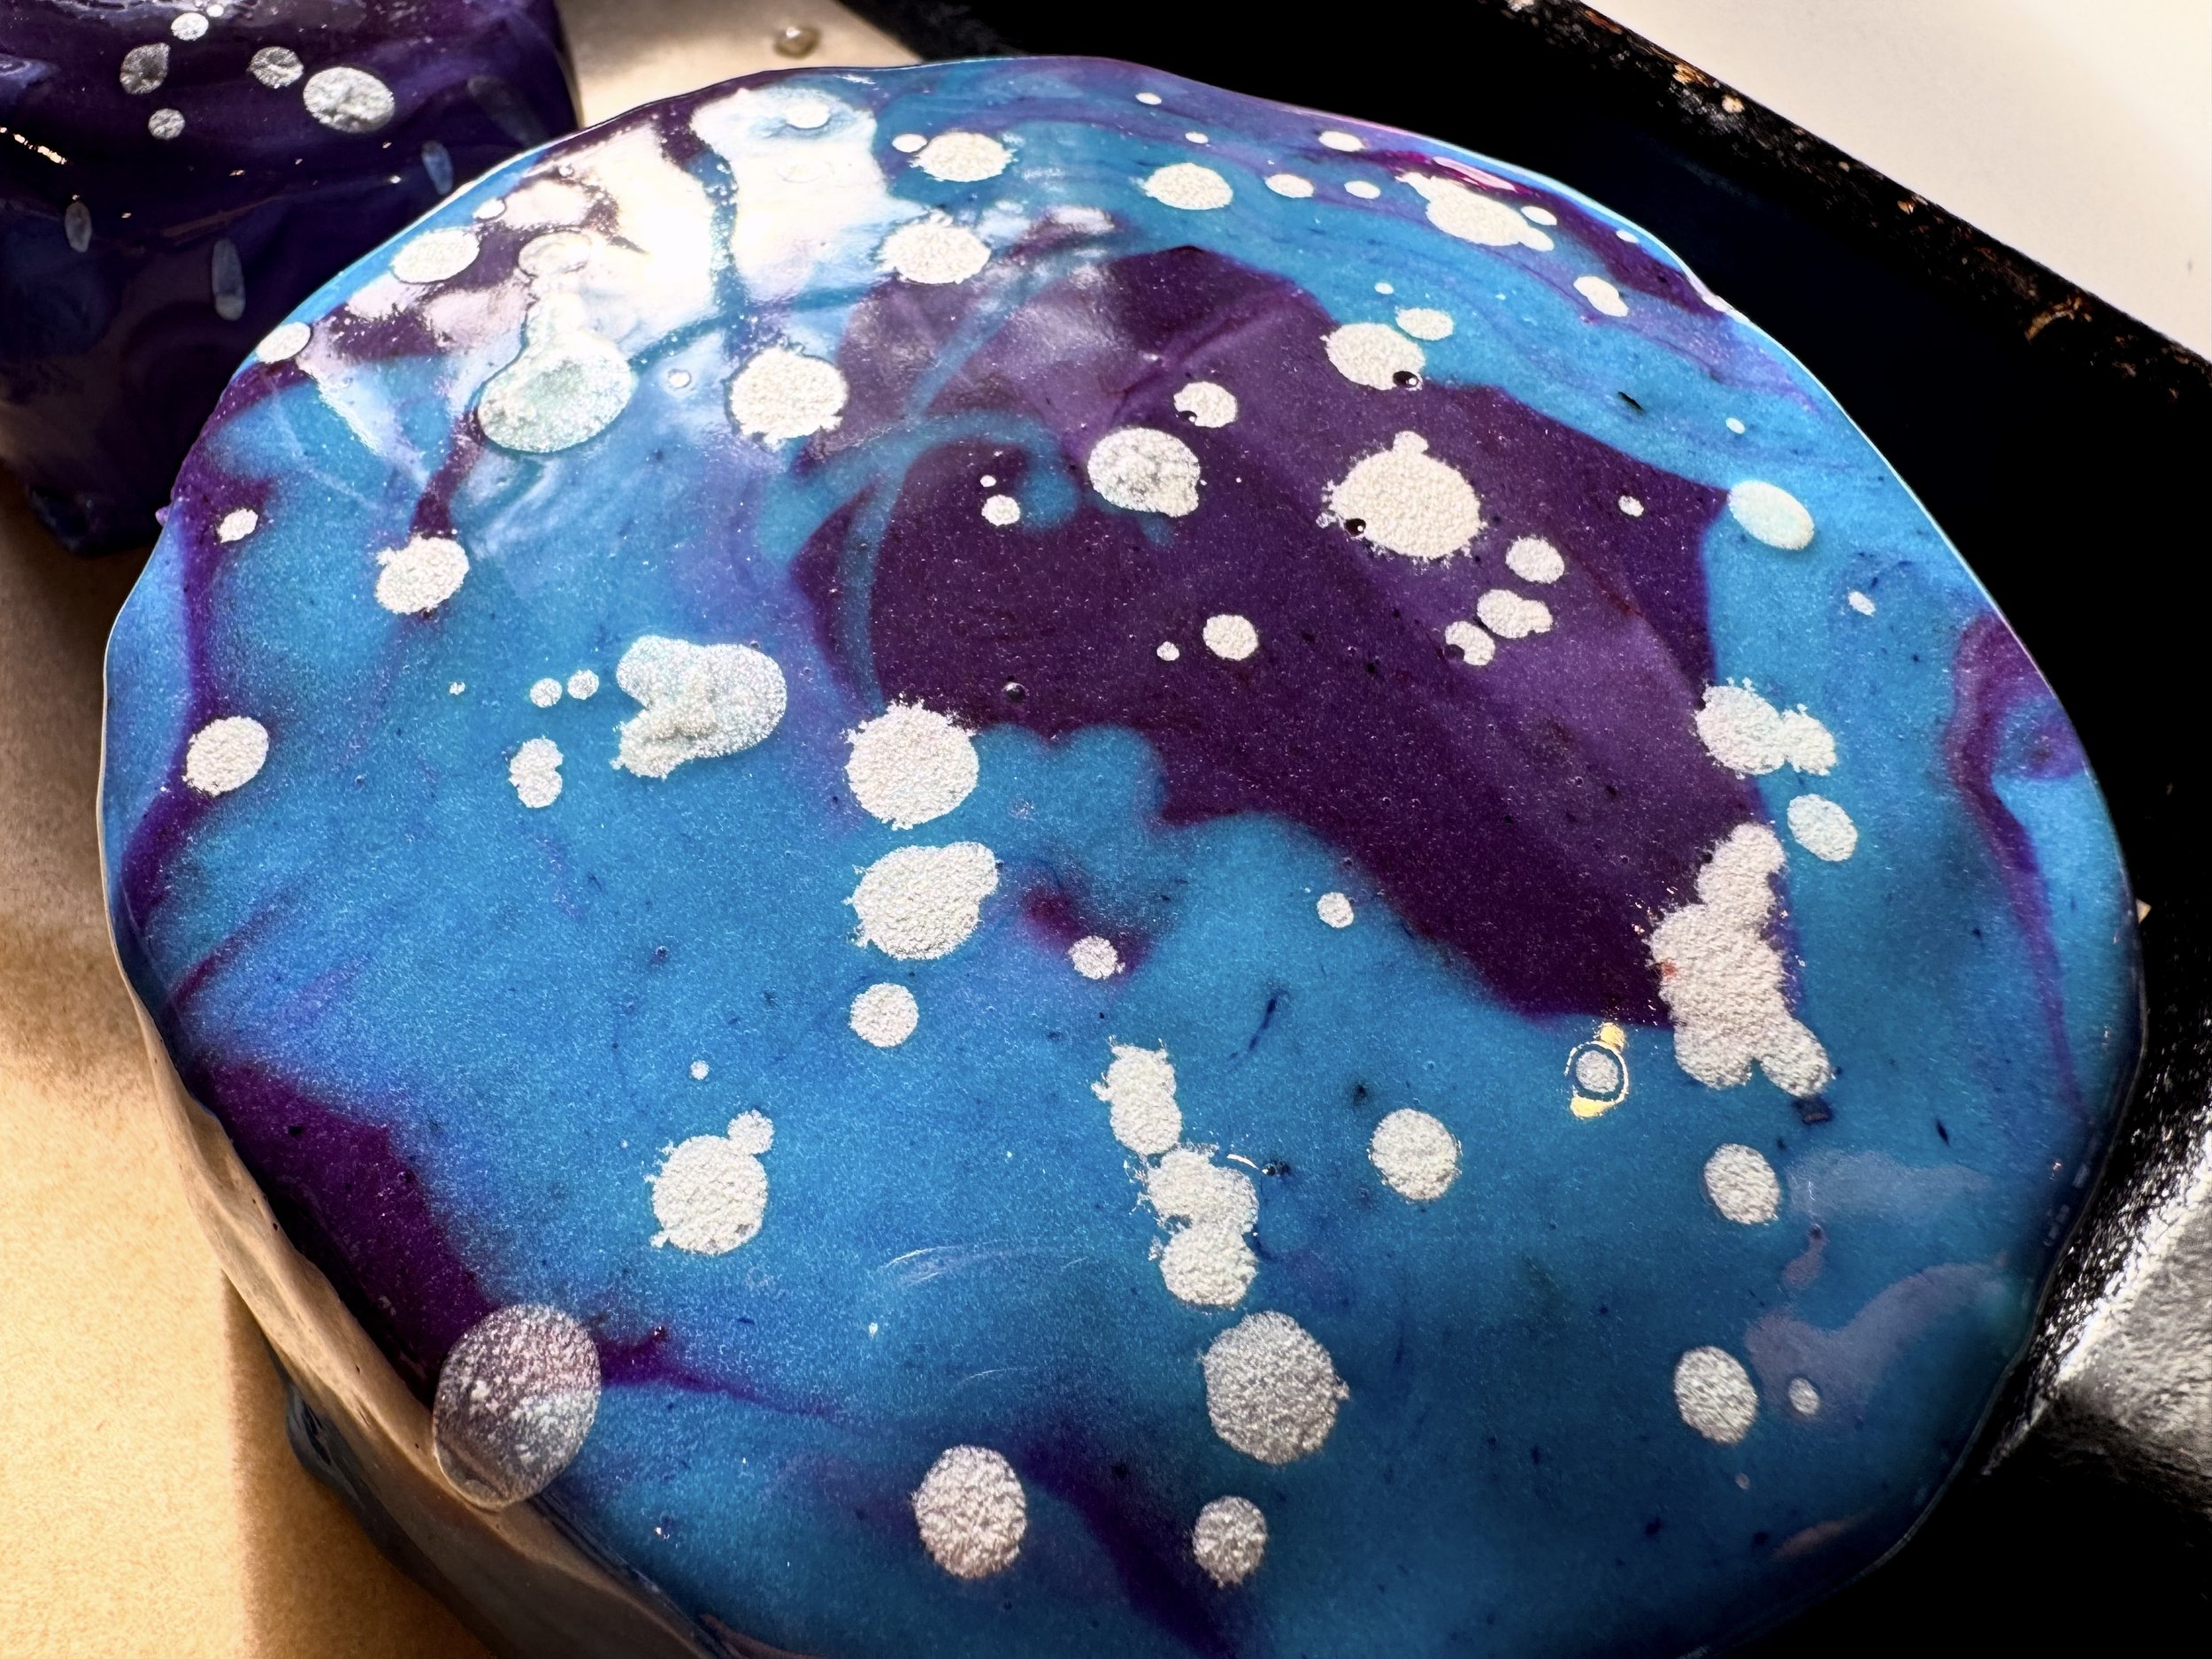
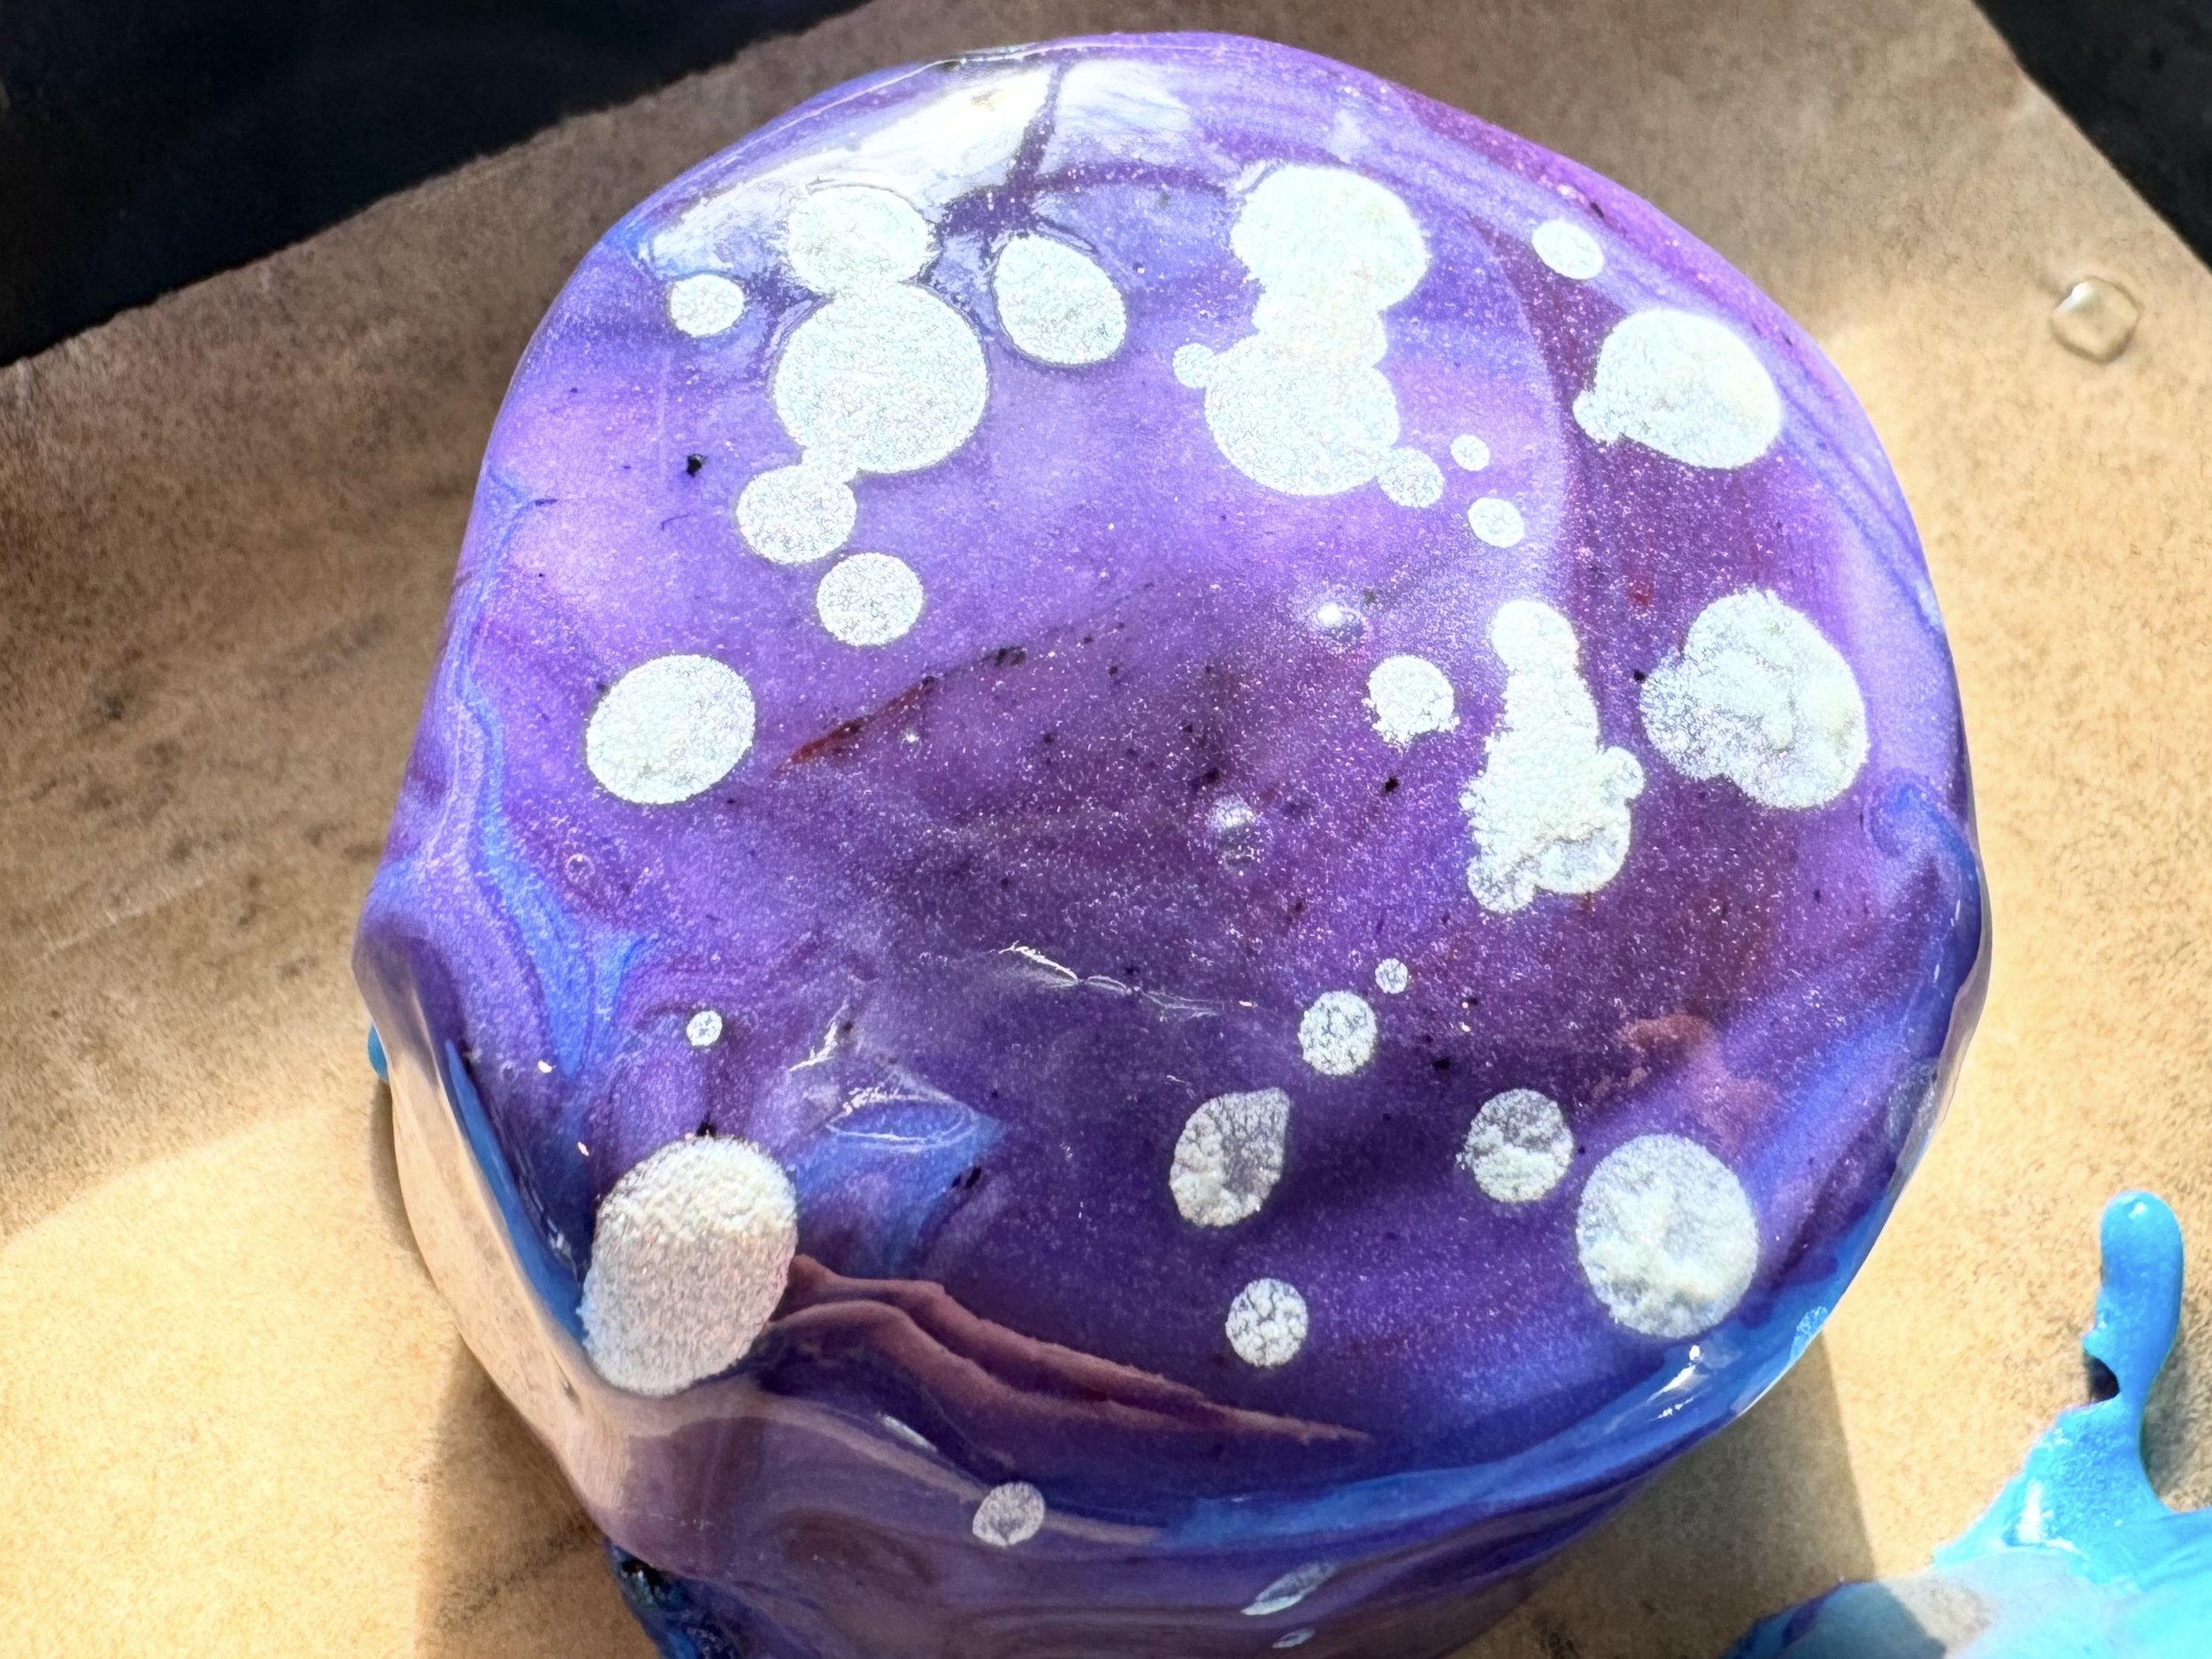
I was determined to try again. Using my leftover white chocolate, I turned to one of the many recipes that used a combination of gelatin and condensed milk to create the shiny finish. This recipe was the basis for my second attempt. I added 7g (one envelope) of unflavored gelatin to the surface of a bowl filled with 40 g of water. While it set, I heated 100 g of sugar with 50 g of water and 70 g of condensed milk, mixing until it simmered. I added 120 g of white chocolate. let it sit for a few minutes, then hit it with an immersion blender. I poured i through a fine mesh strainer into three bowls and let them cool to around 95 °F. While cooling, I added some food coloring to create one bowl each of sky blue, purple, and deep purple. I poured some of each into a cup and poured it over a cake coated in buttercream that had been frozen overnight. The effect was pretty cool. I added some silver sparkles using the same luster-dust technique I had previously applied.

I learned a few things.
To create the most appealing luster dust sparkles, dilute the luster dust with a clear alcohol. Err on the side of more dilution to achieve a more diffuse effect.
Swirling the different colors in the cup prior to pouring creates a better-looking blended effect than alternating colors. Using. a palette knife with a light hand can also work for the top surface.
Mixing some luster into the glaze makes it more interesting.
When I first attempted to cut into one of the cakes, the knife stuck to the glaze and pulled it, creating a mess. Later, I chilled the cakes a bit and used a knife dipped in hot water, and this allowed me to make a clean cut. Here’s the bottom line, though. While the glaze looks good, it’s got an unappealing rubbery texture and can even be peeled right off the cake. It doesn’t taste much like anything (and wasn’t as cloyingly sweet as I feared), but the texture definitely detracted from the experience. I’ll probably try a chocolate-based version out of curiosity, but the cool look may not be worth it if you actually intend to eat the cake and are older than 8.